

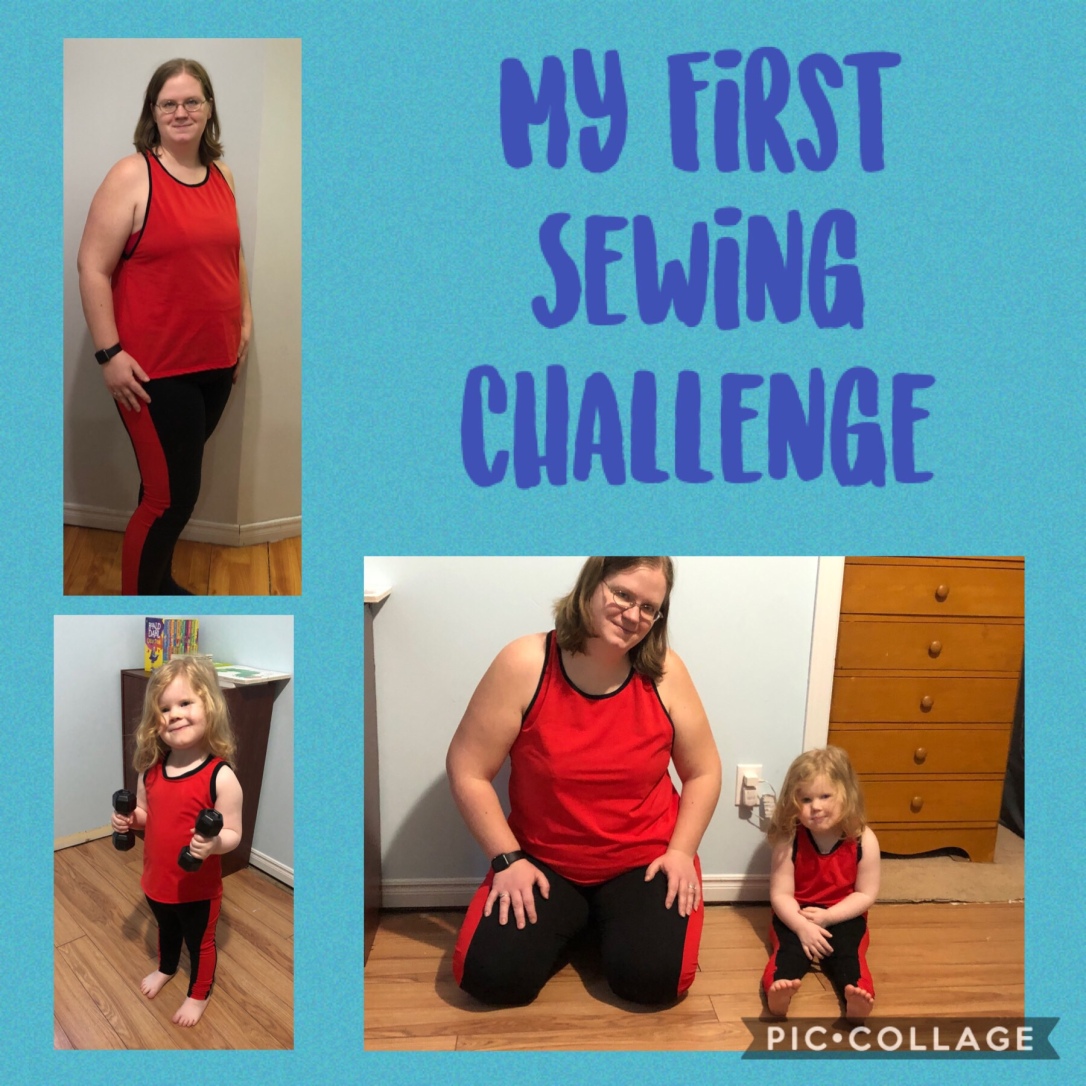
February/ March had me participating in my first sewing challenge. It was a Fitness Capsule Challenge by Greenstyle Creations. “What is a capsule?” You may ask (I know I had to, the first time I heard the term.) A capsule is a set of items of clothing that can be used to make up multiple outfits. For example: 2 pants that match 4 shirts and a cardigan that goes with all of them. So you pick a colour scheme and a style for all your pieces.
Personally, whenever I buy or make or make pants, with the rare exception, I buy neutral colours (or jeans.) The couple of times I have gotten coloured pants, I rarely wear them because they don’t really match any of my tops, or maybe match just 1 top. So I really liked the idea of making a capsule.
This particular challenge was hosted in the Greenstyle Creations Facebook Group. The rules of the challenge was that you had to make at least three pieces that go together using Greenstyle patterns.
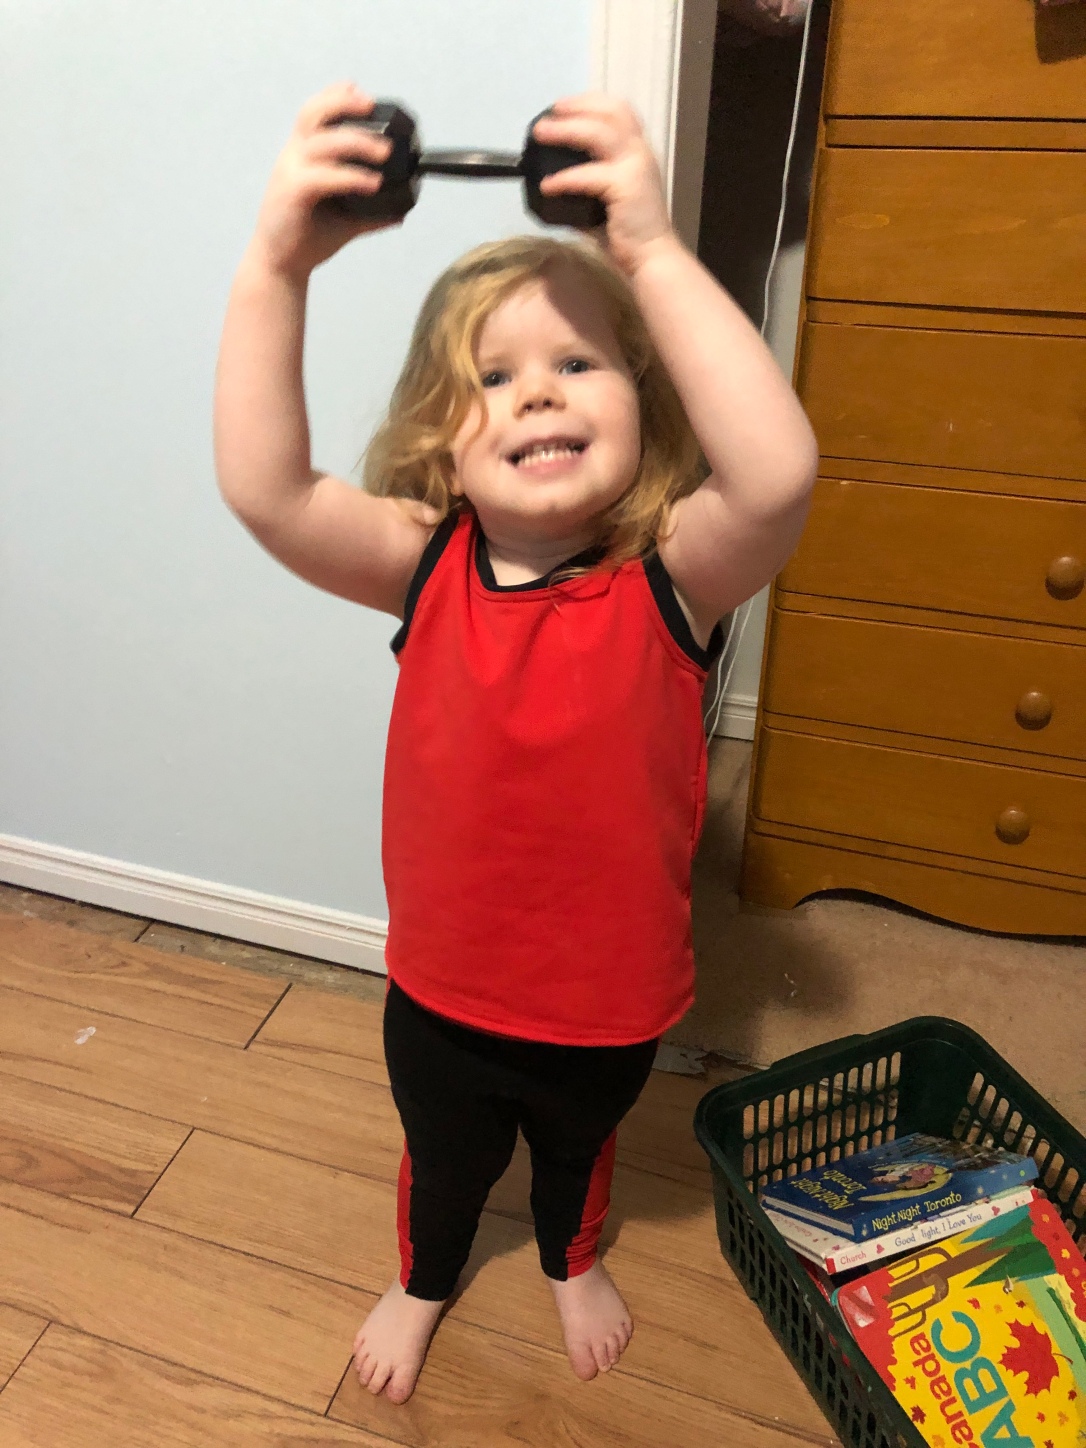
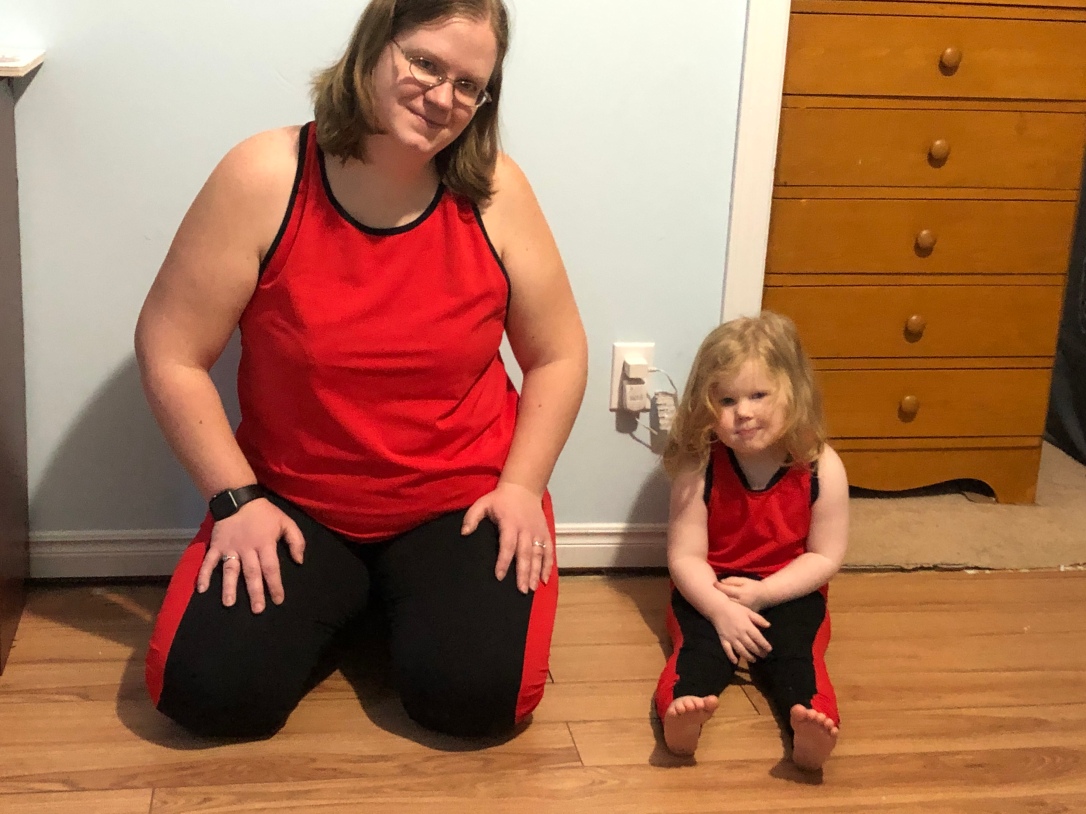
What I came up with wasn’t a full capsule, but it met the criteria of the challenge. I made five pieces total. Three for me, and two for my toddler. Yes, I made matching workout wear for my 2 1/2 year old. Rose loves working out an often asks to exercise (or as she puts it E! E!) When I had almost finished my top Rose stole it and was running around wearing it like a dress and wouldn’t give it back until I promised to make her one too.

I decided to go with Red and Black for my colour scheme. Before I decided to participate in this challenge I had decided to make the power bra out of scraps from my family’s Halloween costumes I made back in the fall and some leftovers powernet from a different project (for extra support). When I decided to do the full challenge I went out and picked up some more red athletic fabric from Fabricland (it was on sale for 50% off at the time) unfortunately the red wasn’t the same shade of red as my old fabric (more of a warm red than a cool red) but I think it still works.
Athletic fabric can be notoriously slippery to work with, so it is a bit more of a challenge. I wanted to make my set nursing friendly as I hate having to lift my whole shirt and sports bra up to nurse when my baby inevitably decides she’s hungry while I’m working out.
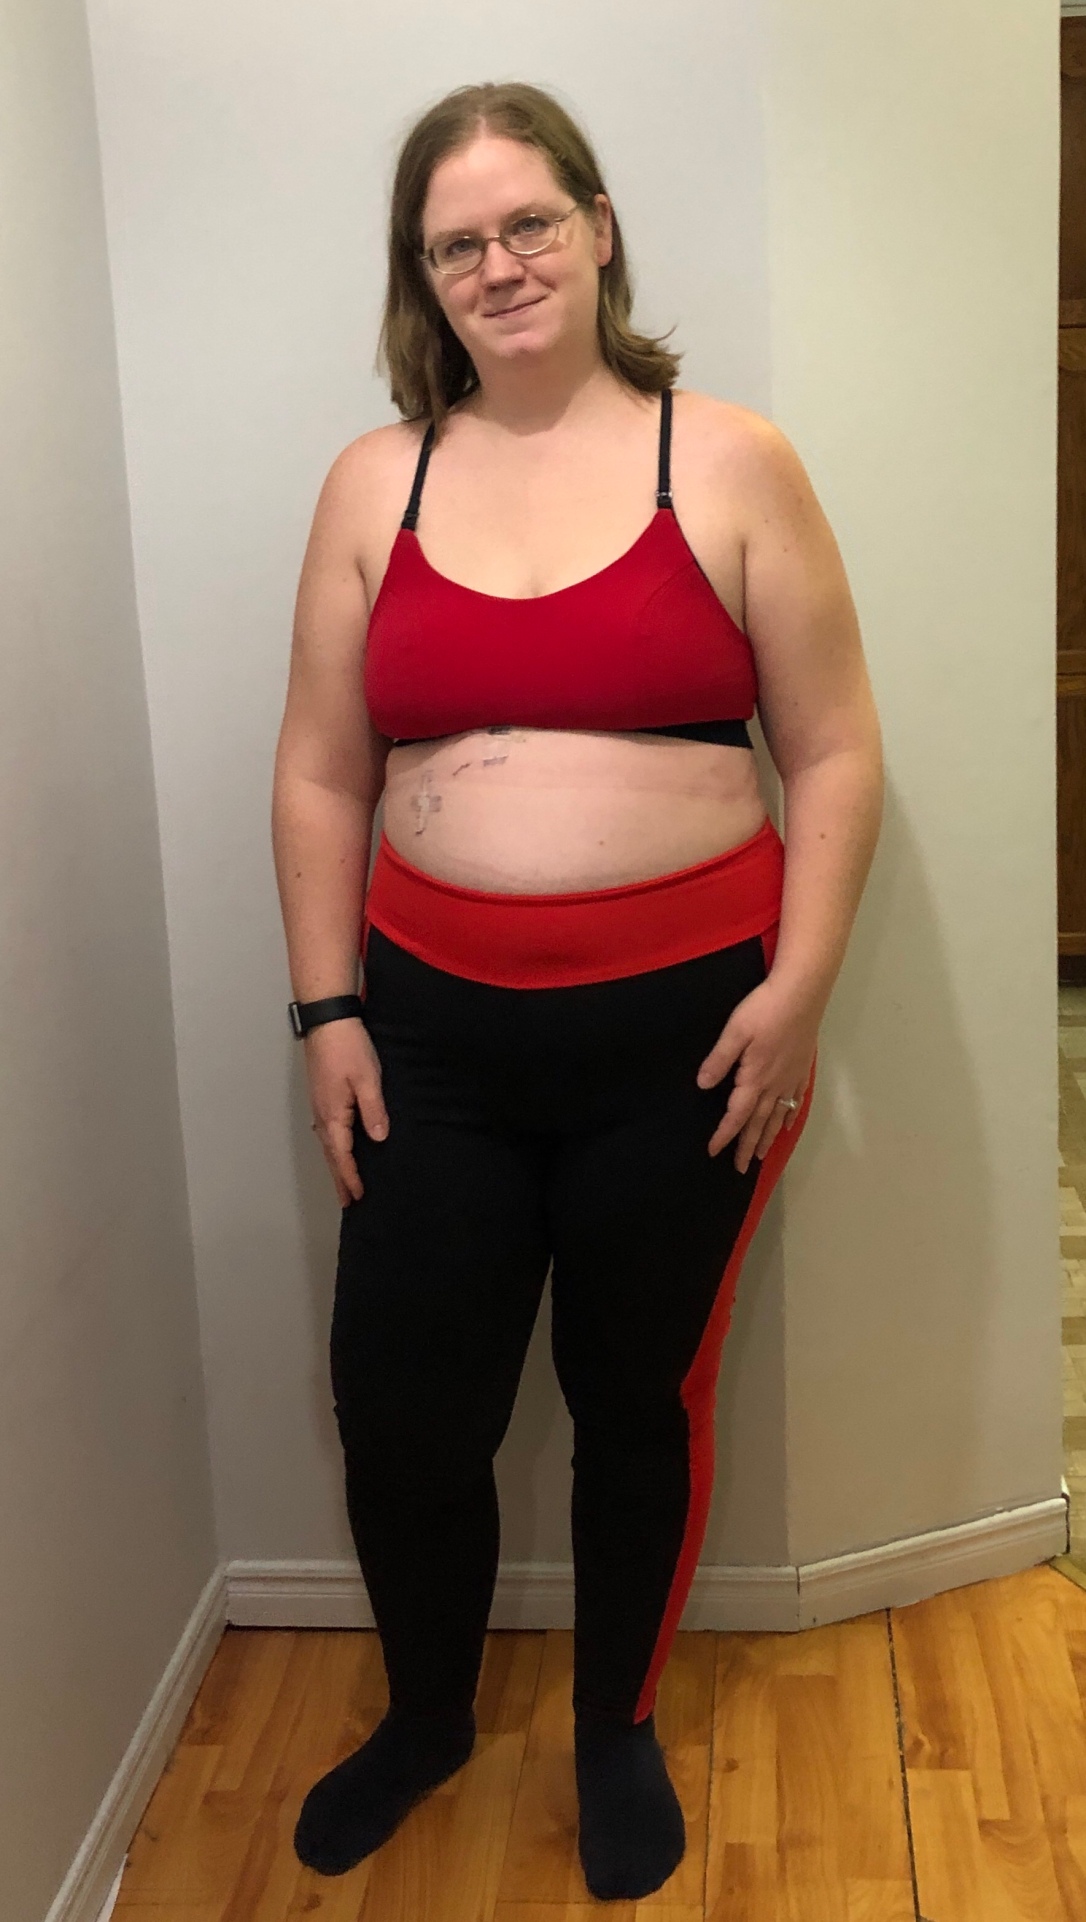
Power Bra

I started with the Power Bra. It is a sports bra with lots of options. There is a nursing option built into the pattern along with adjustable straps. There are 3 different backs: the racer back, strappy cross back and a strappy U back. The racer back has a couple options: there is an optional pocket, and keyhole back. There is a also an optional adjustable back closure.
I decided to go with the Strappy U back and the nursing option. I bought the wrong size nursing clips so instead of having two straps go over each shoulder I only did one each, which meant I needed to make some slight modifications to where the straps are inserted, but not a huge deal. I love that the bra can be made out of leftover scraps so you don’t have to buy a lot of fabric, just elastics.
I love how my bra came out and want to make a bunch more! I did have some challenging bits. My tension was giving me a little trouble on the parts with more layers. My left needle kept skipping stitches. I need to change my needles as I haven’t changed them in a while but I need to pick up some new ones.
One thing I would change next time is where I anchor the strap that keeps the shoulder strap from falling down when you unclip the front to nurse. I anchored the strap at the bottom by the side seam, but that means that that strap is at too much of an angle and you can see it popping out of the top of the bra a bit at the top in the above picture. I wouldn’t do it straight down I would still put it at a bit of an angle, just not that far over.

I did the lower cut neckline on the front but there is also a higher neckline option as well. There is also an extra coverage under the arm option that I will try next time. I used silicone backed bra strap elastic for my shoulder straps, but there is an option for making your straps out of fabric and clear elastic so it can match the rest of your bra.
I would say that this bra pattern is confident beginner friendly. I had some challenging points and spent some quality time with my seam ripper, but I think that was mostly needing to work on my serger settings and changing my needles.
There is a great set of video tutorials on a blog called Sewing with Sarah (different Sarah) that shows you step by step how to make the bra. I found it very helpful. The videos were made to be part of a Sew-a-long so it is broken up into four parts showing each of the different options.
The Solo Tank
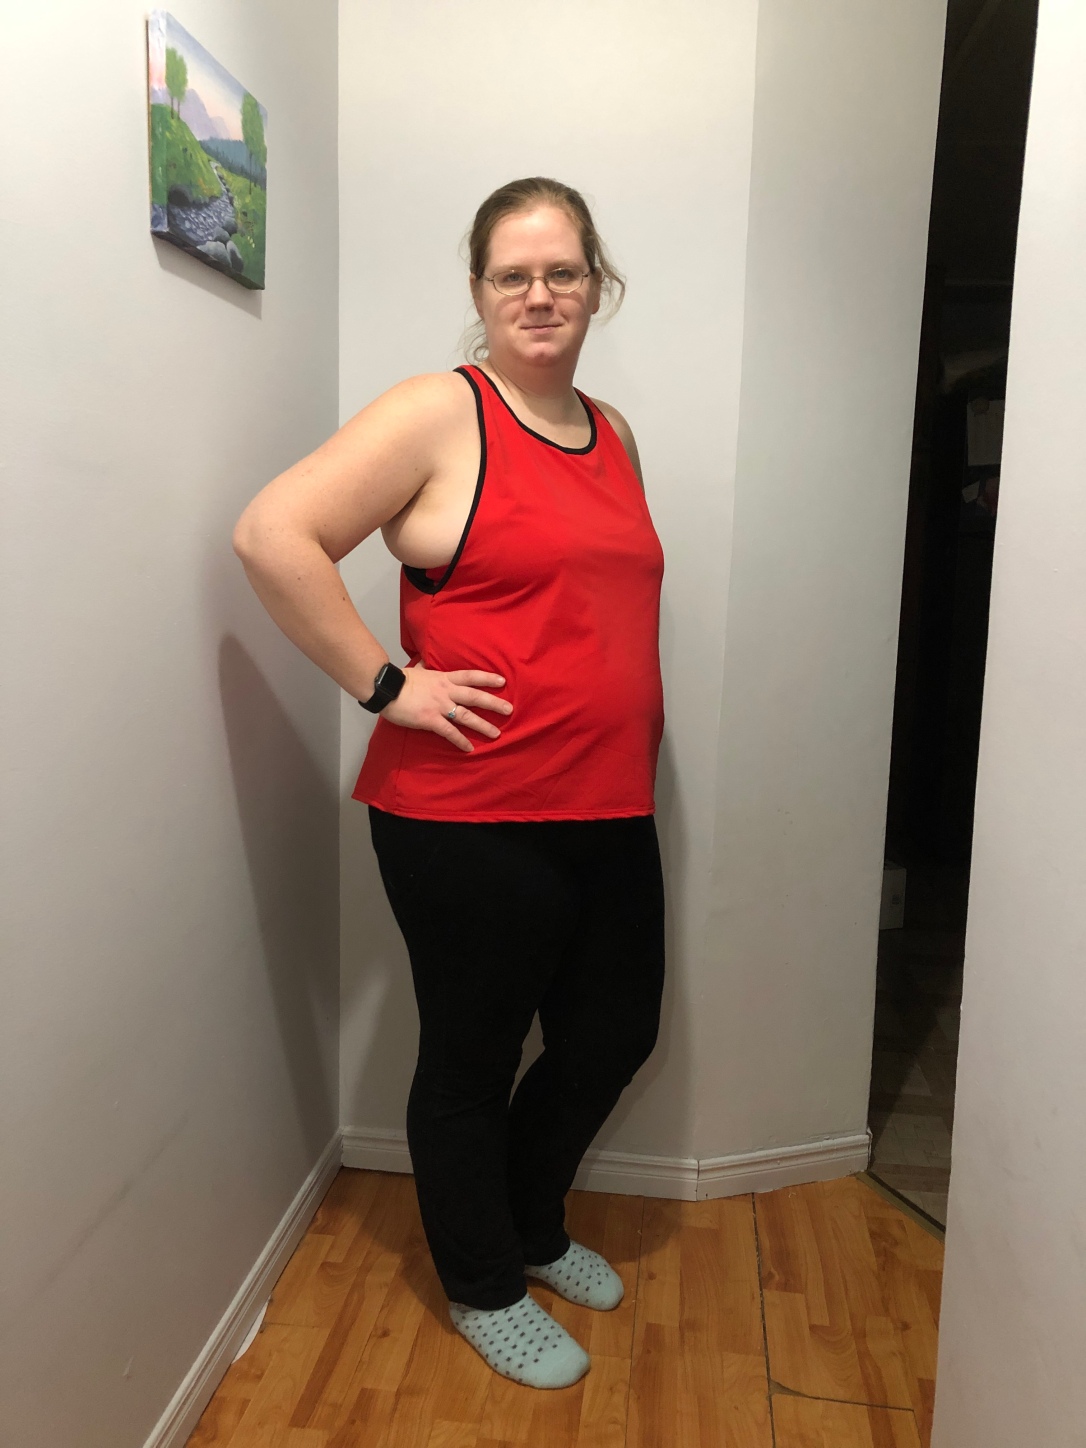
The solo tank is not my typical style. The reason I picked it is because of the oversized arm holes. Not my style, but nursing friendly and for that I like it.

I don’t have to unclip anything to nurse (except my bra), I just have to shift the armhole over to the side. The fit of the shirt is actually much looser, but I took the side seams in as I prefer a more fitted look.
The solo tank has two different neckline options and a racerback. There is also an option for a small side tie. It has a loose fit and of course the oversized armholes I was talking about. It was really easy to put together. For my next one I’m going to size down through the waist and hips and try a fabric with more drape.

My daughter loves to steal my solo tank and wear it like a dress and run around in it.

The Slope Tank
I had an unexpected quick addition to my capsule after my daughter stole my shirt. I promised to make her a matching shirt a) to get my shirt back, and b) because we both love matching and I had enough fabric on hand to do it.
There isn’t a youth version on the Solo tank, so instead I used the free Slope Tank pattern.

The Slope Tank was another quick and easy sew. It has two options for the hem line, either straight (shown above) or a sloped curved hem line.
Strides/ Girls Strides

To finish up my matching set I made myself and my daughter matching Strides/ Girls Strides (which can be purchased separately or in a bundle)
I love the colour blocking for this pattern! Technically you can do everything one colour but I love how the side piece (in my case the red) goes up the side, curves up over the bum then back down the other side. The women’s stride pattern was just updated to have a bigger side pocket option to accommodate today’s bigger cell phones.
This pattern is another with lots of options! You can have a plain side insert or one with side pockets. (Who doesn’t love pockets?) There is also an optional hidden waistband pocket in the contoured mid or high rise waistband. There is also an optional oval gusset and cross cuffs.
There are multiple length options, from shorts to extra long (I made the long which ended up being a bit too long). I neglected to measure my daughter’s inseam before she went to bed the day I was cutting out her strides so I made the longest length and I haven’t hemmed them to the proper length yet which is why hers are way too long.
The strides were pretty easy to make. I accidentally put mine together using the same method as Pegs (a different legging pattern by a different designer, which I have blogged about here) but that mistake was totally my fault as I misread one step of the instructions (it was totally obvious I was just so used to doing it the other way). Instead of ripping out one of the longest seams (again, as I had accidentally sewed one of the pieces with the seam on the outside so I had to rip it out before) and since I wasn’t using the gusset I just finished them the Peg leg way.
The one thing I found at little challenging was figuring out which back panel piece went with which side panel piece. It took a few minutes of staring at it, and placing one side piece then the other on the back piece, trying to figure out how the went together (It was the curve that was confusing me). Once I got that concept it was easy. The Girls Strides went together more quickly and correctly. I didn’t use the gusset in either pant, but I may try it next time. I think the only reason I was having trouble figuring out which side/ back pieces went together was I was still a little out of it post gallbladder surgery (which it why there is tape on my stomach in the above pictures).
I quite like the Strides pattern and am excited to make some more!
I really enjoyed this sewing challenge. I still have some leftover fabric to make some more pieces to expand my capsule. I should probably get back to the rest of my long list of projects that I really should have done first though (including a couple Christmas presents that I still have to finish, and a few baby gifts).

Very nice and fun that you in life your daughter both with the sewing and the work out, good job Mom.
LikeLike
Thank you!
LikeLike
Include, so sorry did not catch that before sending.
LikeLiked by 1 person
I love matching my daughter! She loves it too! She also really loves matching her sister (who is 10 months old).
I love setting a good example for her by letting her watch/ participate in my workouts…. even if that means she’s climbing all over me while I’m trying to do it.
LikeLiked by 1 person
My 11 children are all grown now. I totally enjoyed sewing for them especially the girls dresses. I taught school where the first 6 attended until we started to homeschooled. I miss those precious days of just being together.
LikeLike